Table of Contents
Fine tuning your development setup
Using IRC for contact
If you do have questions regarding issues in a development version, please do ask in the Xubuntu Developer channel (chat room)- don't worry if you dont understand much of what is being discussed there - don't be put off as the community is a friendly bunch and is always happy to see more potential testers. Just ask your question and people will try to help you.
You can access the channels most easily via the following links - just choose a nickname (preferably one that's likely to be unique - and easy to type!), the channel is already inserted for you (and ignore the Auth to services box, unless you have already registered your chosen nickname - see below)
- If you want to talk to the developers choose #xubuntu-devel. For testing this is the one that you will almost certainly want to use
- If you have a more general question, for example about an issue with a package that isn't from Xubuntu, or with network configuration etc, then choose #ubuntu+1
- For non-Xubuntu questions (e.g. about IRC!) or just to chat #xubuntu-offtopic
With IRC you will miss messages when you are not logged on, but luckily the latest Xubuntu-devel and Xubuntu Support channels are logged and updated every hour or so, and you can find older ones here. Similarly, other people won't be in the channel all the time either - but if you say that you'll check the weblogs later for an answer they will at least try to get back to you even if when they come back you are not around.
Although it's not essential, it is a good idea to register your chosen nickname for IRC, so that you can be guaranteed of always having the same recognisable identity because you can then use the same name across sessions and across the channels and people will be able to recognize you:
Just enter any IRC channel via one of the links above (Remembering to choose a nickname!) and type, '/msg NickServ REGISTER password youremail@example.com' substituting a password of your choice and your email.
Then you will receive an email allowing you to register your chosen nickname (as long as it isn't already taken).
You can also use an app for IRC, Hexchat (an Xchat fork) is popular with Xubuntu people who can help you get up and running, there is a wiki page for Xchat which will work for you to setup Hexchat.
Manual Partitions and Bootloader location
If you have more than one installation on your system, often the autoresize option won't be available. Or you want control over where your new install goes.
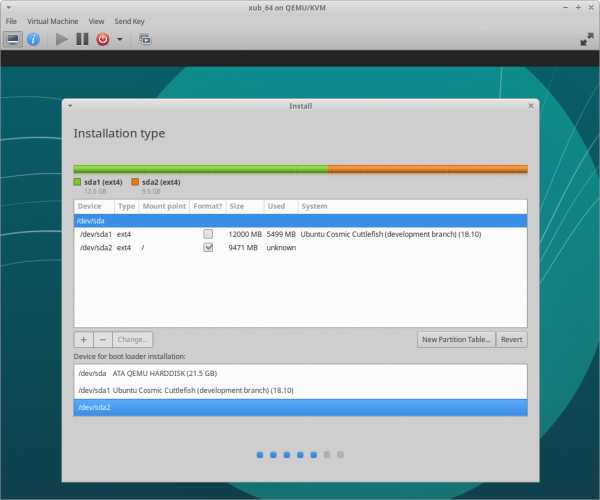
Use the Something Else option and you will be shown a list of disks and partitions on your system, with any unallocated space shown as such.
You can create partitions or edit existing partition sizes until you have a new partition available to install too.
The following runs through using the installer to create a new partition and then install to it.
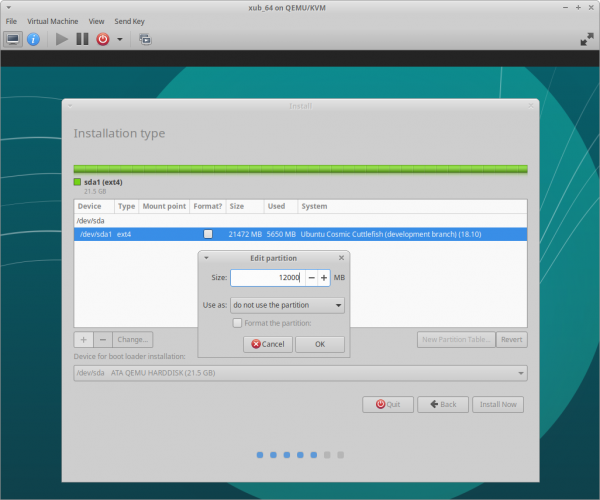
Once at the Something Else window, select the existing partition you wish to resize and then the Change button - set the partition size you wish to keep for this partition.
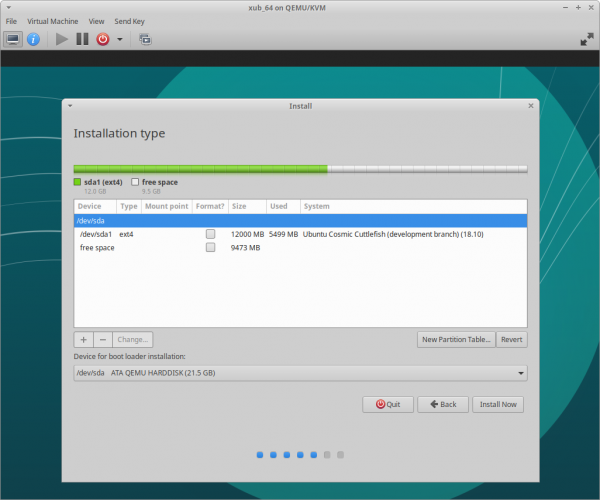
Now, select the resulting freespace
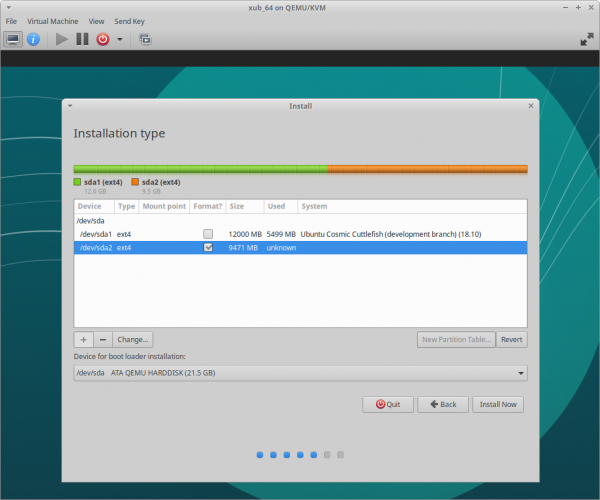
Press the + button to create your new partition
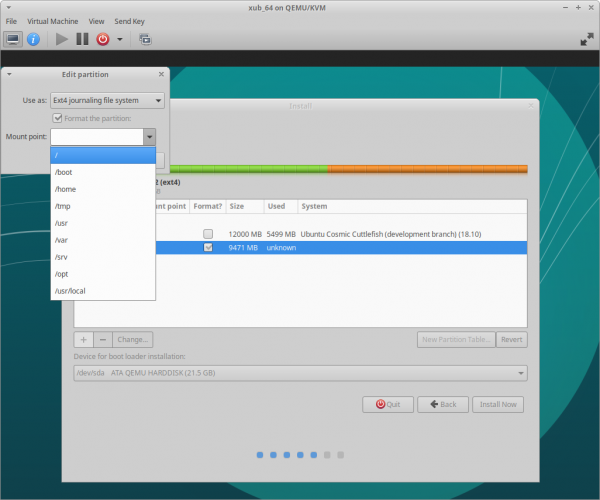
Now you can use the Change button to set the mount point for your new installation.
Once you have done that you can continue with your installation using your new partition.
In this scenario - grub (the bootloader) will be installed to the disk from your new installation.
There are times when this is not what you want. If for instance you are resizing your main install and want that to keep control of your bootloader.
This can be done by changing the bootloader device.
Press Device for bootloader installation and a drop down will appear showing your available partitions. Choose the device which corresponds to the installation, in this example /dev/sda2 and then continue the installation
Once the installation has finished you can reboot as is normal, however in this case there is no way yet to boot into your new installation as your main bootloader doesn't know about it yet.
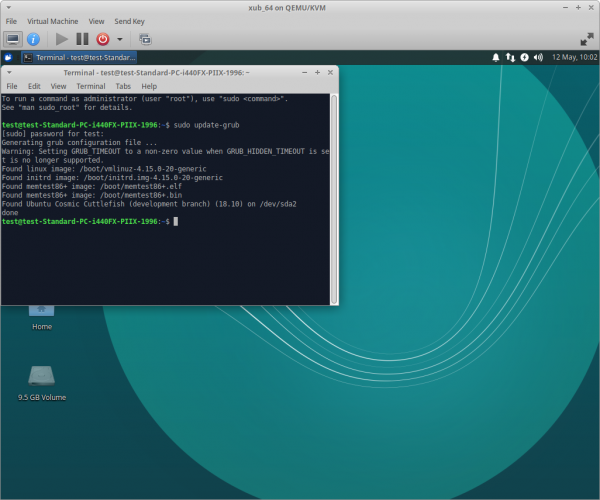
Login to your main installation, open a terminal and run this command (this updates Grub and finds all systems it can boot)
sudo update-grub
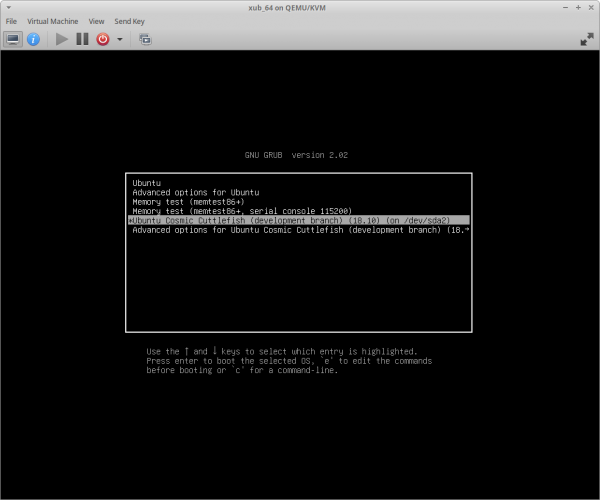
Reboot the machine again and your new installation will now be available in Grub.
Note: when installing Grub in this manner - kernel updates to your development installation will not be reflected automatically in the Grub menu until you have re-run update-grub.
Adding an ISO to Grub
Sometimes you might find it easier to have the development ISO available as an option in your Grub menu.
This will work just like booting the ISO on a USB except all you can do is run the live session - on your hardware - without being able to install it.
To do this you need to copy your ISO somewhere that it can be found by grub.
The following are examples of the setup a member of the QA Team uses.
They keep their ISO in /boot/grubiso - a folder they created for this purpose.
To allow for the functionality, you need to edit a system file - /etc/grub.d/40_custom. To edit the file, Alt+F2 then use this command to edit the file as root pkexec mousepad /etc/grub.d/40_custom
It is important that the default top lines of this file are not changed.
The following content works for the QA member because, the location of the ISO file (grubiso) and the hard drive setting (hd0,5) are correct for them. You need to input your ISO location and hd setting. The remaining parts should then work for you.
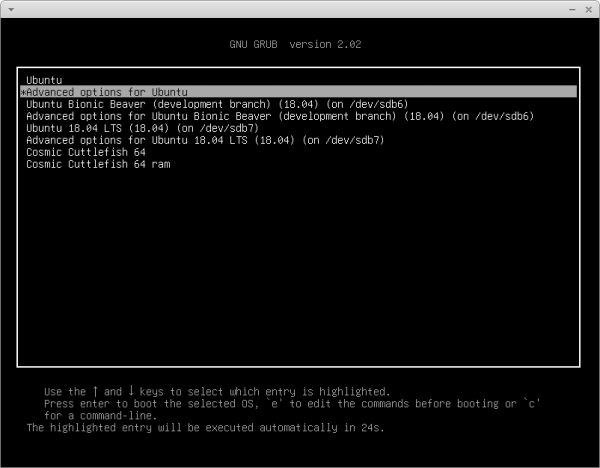
They have 2 options available on their grub menu, one boots the ISO directly, the second loads the ISO into RAM and then boots from there.
menuentry "Cosmic Cuttlefish 64" {
      set isofile="/boot/grubiso/xubuntu-cosmic-desktop-amd64.iso"
      loopback loop (hd0,5)$isofile
      linux (loop)/casper/vmlinuz boot=casper iso-scan/filename=$isofile noprompt noswap noeject
      initrd (loop)/casper/initrd.lz
}
menuentry "Cosmic Cuttlefish 64 ram" {
      set isofile="/boot/grubiso/xubuntu-cosmic-desktop-amd64.iso"
      loopback loop (hd0,5)$isofile
      linux (loop)/casper/vmlinuz toram maybe-ubiquity boot=casper iso-scan/filename=$isofile noprompt noswap noeject
      initrd (loop)/casper/initrd.lz
}
Once the file has been edited and saved, you must update grub to include your new ISO options, sudo update-grub, when you reboot you should now see them on your Grub menu
QA Team Contributor Information
Further, more detailed, information can be found at the Xubuntu Team's Contributor Documentation, Chapter 4 of which is specifically about the Xubuntu QA Team.
